Anyone moving up from a pre-assembled entry-level turntable will sooner or later be confronted with setting up their first cartridge. Approach this daunting task with a little respect for the delicate mechanics and our step-by-step guide, and you will quickly realize that the process is actually quite manageable.
When it comes to turntable setup and cartridge alignment, it has proven to be a good idea to proceed in a defined sequence, which we will go through in detail below:
- Setting up and balancing the turntable
- Mounting and wiring up the cartridge
- Setting the tracking force
- Adjusting the tonearm height
- Aligning the cartridge
- Setting the anti-skating force
Before we begin, let’s get one thing out of the way: Even though there’s no reason to dread setting up a turntable, the process does require careful attention, patience and a light hand. So take your time and remember that there is no screw on a record player that needs to be bolted down for eternity – finger-tight is just right.
Setting up the turntable
To ensure that everything runs smoothly during playback, you must first make sure that the turntable is as perfectly level as possible. To check this, we recommend using a circular level that you can place on the bare platter after you have set up the turntable on a flat, stable surface. Many turntables have adjustable feet that you can use to level your turntable.
Mounting and wiring the cartridge
The next step is mounting the cartridge on the tonearm, which should ideally already be mounted on the plinth during this step. The headshell has two rails that offer a certain amount of leeway when it comes to the exact position of the cartridge. This will enable you to fine-adjust the alignment of the pickup later in the process. The cartridge or tonearm should be supplied with at least one pair of suitable screws, which you can now insert from above through the headshell rails before screwing them into the threads provided on the top of the cartridge. For now, only tighten the screws loosely so that the cartridge can be moved around in the headshell and align it approximately in the middle.
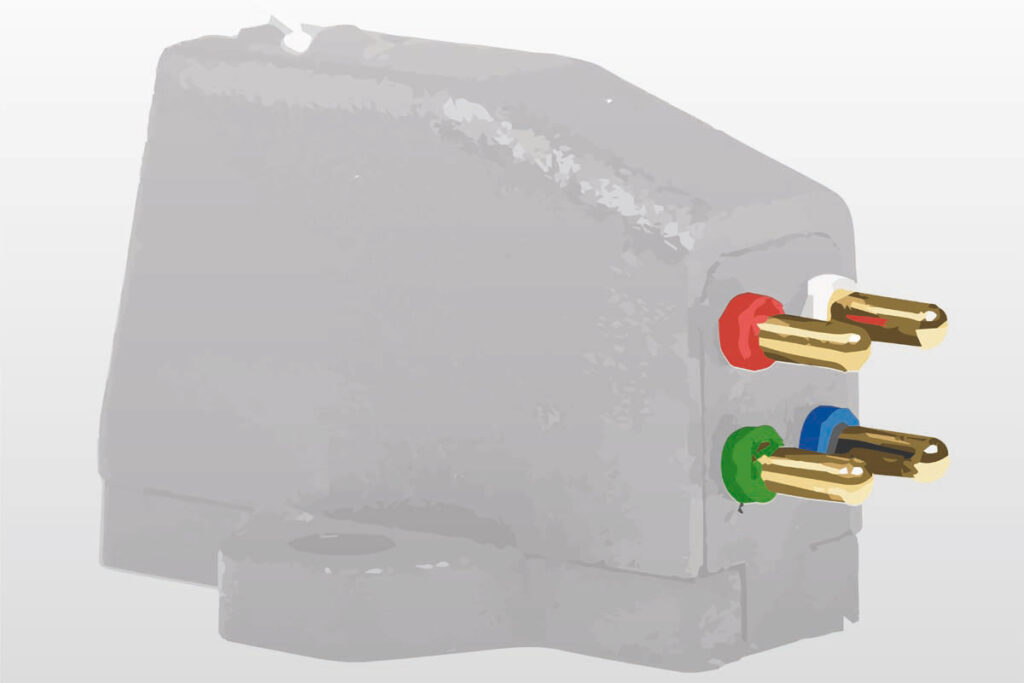
When connecting the tonearm, patience and sensitivity are a must as the tonearm wires are very fine and delicate. A color coding indicates which cable goes where. Red and white are usually used for the right and left signal wires, green (right) and blue (left) are the respective ground connections.
If the color markings on your tonearm or pickup differ or are missing altogether, consult the user manual. The terminating sleeves of the tonearm cables should slide onto the contact pins on the pickup with moderate resistance using tweezers or small pliers. In some cases, however, they may be too tight or too wide. In this case, you should carefully press them closed with needle-nose pliers – just enough to make sure they can be properly seated – or widen them slightly with a very small screwdriver.
Setting the tracking force
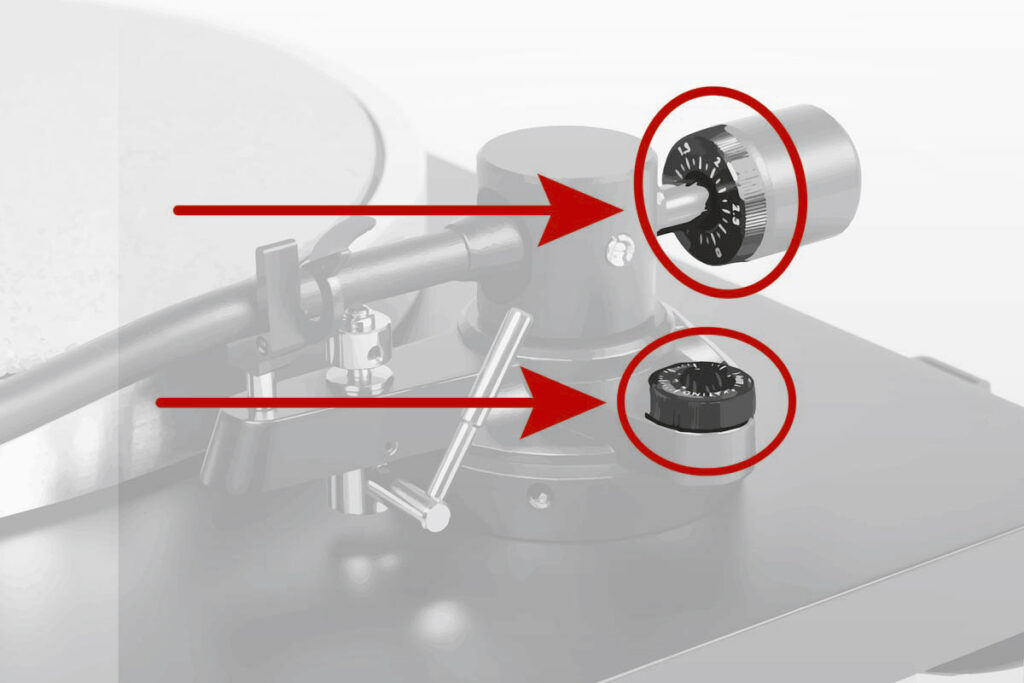
Next, remove the tonearm from its holder and move it between the resting position and the turntable. Always keep your index finger under the tonearm’s finger hook to prevent the cartridge from dropping onto the plinth. Now carefully adjust the counterweight of the tonearm (it usually sits on a thread) until the tonearm floats horizontally by itself. On many turntables, the counterweight is fitted with a gauge disk that you can rotate to set it to zero when the tonearm is balanced. Then turn the weight in until the disk shows the recommended tracking force for your cartridge.
If you want to be super precise, you can of course use a tonearm scale, which is placed on the turntable and indicates the exact contact force of the stylus carefully placed on the measuring point.
Vertical tracking angle
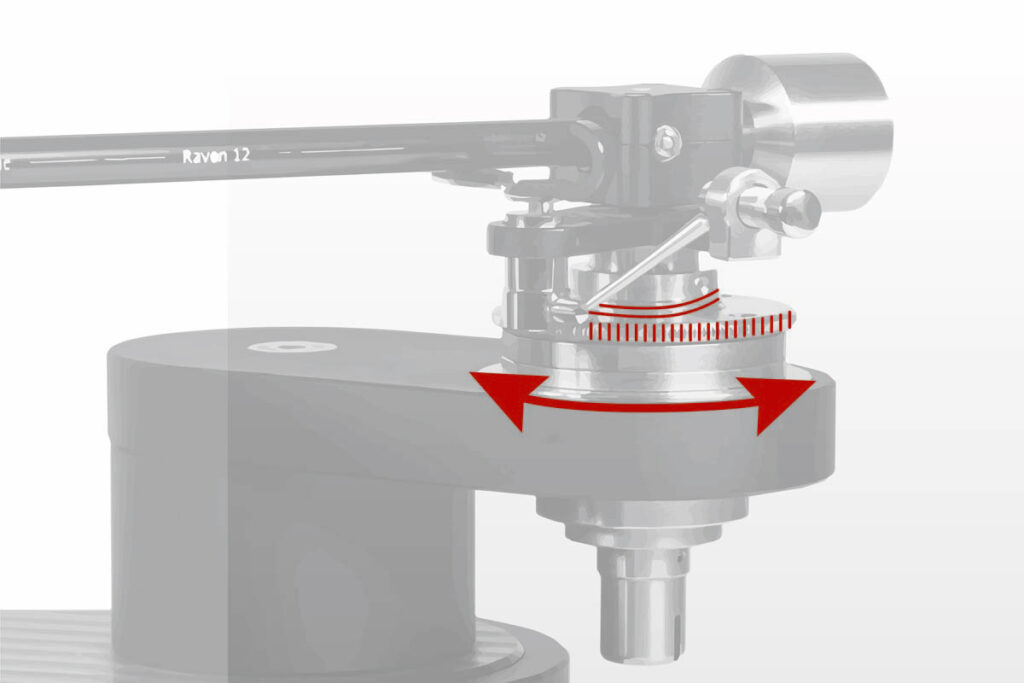
The vertical tracking angle (VTA) describes the inclination of the stylus around the lateral axis of the cartridge. A vertical tracking angle means that the tip of the stylus lags behind or leads the shoulders in the groove. The VTA is not adjusted on the cartridge itself, but via the height of the tonearm: If this is exactly horizontal during playback, the diamond should – provided the pickup is properly designed and the tracking force is set correctly – point just as exactly vertically downwards. Almost all high-quality tonearms have a height adjustment, for example via a thread.
Rega is a notable exception: the British company relies on spacers to adjust the mounting height. As it can be tricky with some tonearms to determine whether they are exactly parallel to the record level, some models are equipped with guide lines for this purpose – such as the conical tonearms from SME. Speaking of tricky to determine: To help with this, there are acrylic glass positioning blocks that are printed with a grid. The block is simply placed on the record in front of the tonearm and a glance through it reveals whether the arm is correctly balanced. In a pinch, a protractor can do the same job.
In addition to the design of the tonearm and the pickup, the record itself is also part of the equation: as not all LPs are the same thickness, the VTA varies by a minimal amount from record to record. It is therefore advisable to adjust the treble using a moderately thick record – unless you prefer to listen to fine vinyl and therefore choose to optimize for 180 gram pressings and accept corresponding compromises with thin bargain bin albums.
Azimuth
In addition to the vertical tracking error angle, the term azimuth is often used in the context of cartridge alignment. This is the angle of the stylus when viewed from the front. With single-point bearing tonearms, it is essential to correct the azimuth, whereby small mirrors and the aforementioned acrylic contact blocks prove to be extremely useful tools. With popular tonearms such as those from Linn, Pro-Ject, Rega and the more modern SME, however, there is no adjustment option. Many SME standard headshells offer the option of rotating them around the longitudinal axis in the corresponding tonearms and thus correcting the azimuth if necessary.
Tracking angle
The process of adjusting the tracking angle is not complicated in principle, but it does require some dexterity. The correct alignment of the pickup is a hotly debated topic (see box below) – however, most manufacturers have done their homework for us and provide us with an adjustment protractor that is perfectly adapted to the tonearm. Place this template on the center guide pin of the turntable just like a record. As described above, the position of the system in the headshell can be adjusted. Now carefully align the pickup such that the stylus rests exactly on the reference point and the system is exactly parallel to the longitudinal lines. Once it is correctly aligned, tighten the screws down finger-tight.
THE SCIENCE BEHIND THE TRACKING ANGLE
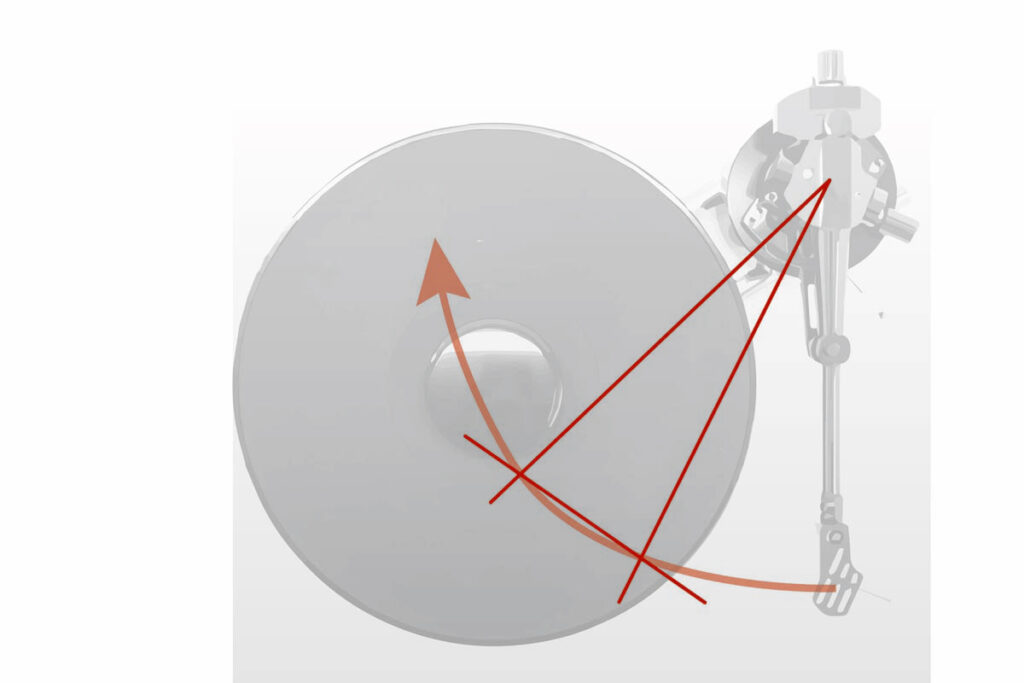
As most turntables use radial tonearms that travel across the record along an arc rather than a straight line, the stylus slightly toes in during playback, resulting in a slight change in tracking angle as the stylus travels from the outside in. There are two points on the record’s playable surface at which the pickup needle tracks without any error – these two points are called the outer and inner null.
The trick now is to place these two nulls by positioning the pickup such as to minimize misalignment of the stylus in the groove at any point of record playback. This entails so many variables that there is no one objectively correct solution to the equation, but in principle an infinite number of plausible ones. For example, there is the question of the playable area: European and Japanese standards assume a slightly larger playable area (i.e. a smaller minimum radius) than American standards, which naturally has an influence on the choice of nulls. The central question, however, is what exactly you want to optimize the tracking angle for. Three generally accepted alignments have emerged over the years.
Löfgren developed two of the three common adjustment schemes in the 1930s. The first of these, “Löfgren A” or “Baerwald”, selects the nulls such that the tracking error peaks (at the beginning, around the middle and at the end of the record) all deviate from the nulls by the same amount – this keeps the maximum tracking error as small as possible. Löfgren B aims to achieve the lowest possible average deviation. However, this results in the nulls being a little further out, which in turn causes a significantly greater deviation at the minimum radius. In the 1970s, Stevenson took another look at the subject, taking into account the realization that the distortion caused by the tracking error increases towards the end of the record due to the smaller groove radius. He therefore set the inner null directly to the minimum radius and selected the outer null – not unlike Löfgren A – in such a way that the misalignment around the center and at the beginning of the record is equal. However, the fact that these three approaches are the most widely used doesn’t mean they are universal; numerous major manufacturers such as Rega and Technics have developed their own in-house standards.
Anti-skating
Last but not least, set the anti-skating. This step is necessary because the stylus is offset from the tonearm’s longitudinal axis due to the headshell being angled inwards.
When playing, the drag from the groove therefore pulls the tonearm slightly inwards. The adjustment method for the anti-skating force differs from manufacturer to manufacturer, although common solutions have become established here, too. Anti-skating is often set using a scaled dial, for example, which is simply turned to match the tracking force. However, many manufacturers also work with other methods such as weights suspended from threads. In such cases, it is best – as is so often the case – to simply follow the manufacturer’s instructions.
And that’s all you need to do to set up your turntable – all that’s left to do now is to sit back and reward yourself some good music.

