Somehow the system isn’t playing to the point – flabby one-note bass, vocals shifting around between the loudspeakers. Could a new set of cables help, or perhaps some absorber panels? Hold your horses – before we dive headlong into the world of costly tuning measures, let’s first get the basics right: Not only does proper speaker placement come free of charge, it’s arguably the most effective of all sound improvement measures.

It’s amazing how two relatively small boxes can manipulate the air in a room in such a way that our hearing can calculate not just one tone but sometimes an entire orchestra just from the changes in air pressure: When a band or orchestra plays, a complex conglomerate of sound waves spreads out from the stage and eventually reaches our ears. As these are basically two tiny points in space, this means that our brain only has two waveforms to work with – and yet, it manages to break them down such that it can differentiate between the individual sound sources – in our case instruments and voices – and determine their respective tonality as well as their spatial relationships to each other.
Stereo music reproduction makes use of the exactly that fact: all this information is contained in two waveforms – this makes it possible to reproduce a three-dimensional musical event of virtually any complexity with just two loudspeakers. For this to work, however, everything has to line up perfectly: Obviously, the loudspeakers cannot reproduce the entire sound field of an orchestra; instead, the two speakers each imitate a waveform that has been created at two different points in space at the venue and send this wave on to the listener – the keyword here is stereo triangle. At one point in the listening room – the so-called sweet spot – the two signals then meet exactly as they did at the recorded concert. This is where our hearing can most precisely reconstruct the recorded musical event from the information contained in the recording.
This sweet spot is what we’re looking for, and to find it we need to achieve two things: Firstly, we need to find the right dimensions for our stereo triangle, and secondly, we need to embed it in our listening room in such a way that the interplay between the speakers and the surrounding walls contributes to the music productively as a pleasantly lively room sound rather than masking information in the form of annoying boominess. But don’t worry, even though the equation has a good number of moving parts, the set-up process doesn’t have to be complicated: We’ll show you a three-step method that will lead you to the optimum set-up – and you’ll need the tape measure as a control instrument at most.
Step 1: Taming the bass funnel
Before we turn our attention to the imaging, we first need to take care of the correct tonality, because the distance of the speakers from the side and rear walls influences the bass response: if a speaker is free-standing, it radiates high frequencies forwards, while the mid-bass and bass with their long wavelengths “wrap around” the baffle and are therefore also radiated to the rear. Conversely, this means that only half of the bass energy is emitted to the front; the loudspeaker would therefore reproduce treble frequencies louder than the low end. However, this is taken into account in the crossover design, resulting in a balanced frequency response for the listener. However, if a solid wall is placed directly behind the speaker, it reflects the bass components emitted from the rear back to the front and the bass level increases by six decibels, effectively doubling in amplitude. The same applies to the side wall, meaning that if you place the speaker directly in the corner, you get a boost of 12 decibels in the bass, i.e. four times the reference.
As we move the speaker further away from the wall, the phase of the reflected wave shifts in relation to the wave emitted by the speaker and the two no longer fully add up, resulting in less boundary gain. This allows us to control the bass level through the distance to the walls – and since in the free field, hardly any loudspeaker can deliver 20 Hertz at reference SPL in the free field, a little help from the walls is actually a good thing.
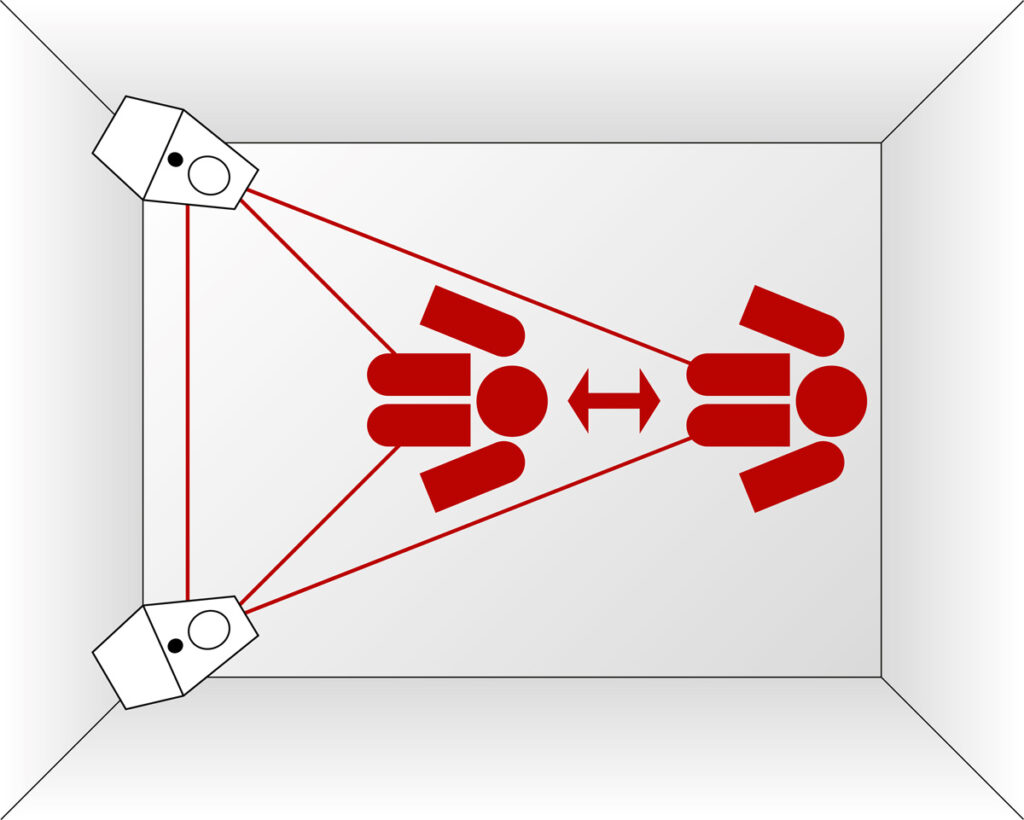
The trick now is to find the right balance. A good starting point is best found with the help of a friend, who should ideally have a sonorous voice – his (or her) bass is affected by the room walls in the same way as the speakers. Take a seat in your designated listening position and have your friend walk slowly towards you from the front wall (i.e. the speaker wall) and speak. Directly against the wall, his voice should sound boomy; the further he moves away from the wall, the clearer and more intelligible he will become. At some point, the balance will tilt and the voice will start sounding hollow and thin. Once you have found the point at which your friend can speak to you with resounding confidence without sounding bloated from the room boom, you have found the right distance between the speakers and the front wall. To find the distance from the side walls, repeat the procedure once from the left and once from the right wall while keeping the distance from the front wall that you found during the previous step. And with that, you have found the stereo base width – and you haven’t even touched the speakers yet! Now it’s time to set them up so that the tweeters are positioned above the points you have just determined and align them so that they radiate straight into the room.
Step 2: Base width, turned inside out
Strictly speaking, the last statement about the base width was not quite correct, but I lied to you with good intentions as the base width can be interpreted in two ways: The base width is the ratio of the distance between the speakers to the listening distance. If we assume a fixed listening distance, the base width must be understood as the absolute distance between the loudspeakers. However, since we have just found the ideal wall distances and therefore do not want to move the speakers, we consider the base width as the angular deviation of the speakers as seen from the listening position and dial it in via the listening distance.
Before we sit down on our office chair, however, let’s briefly explain what the base width is all about: In principle, this is about the best compromise between a wide soundstage and a stable stereo center. The stereo triangle, consisting of the positions of the two speakers and the listening chair, is often drawn as equilateral, i.e. all angles have the same value of 60 degrees. This gives us an angular deviation of the speakers from the listening position of 30 degrees. In many setups, however, this results in too wide a positioning. We therefore make do with an isosceles triangle (the listening position sits symmetrically between the speakers): The closer you sit to the speakers, the wider they are positioned towards you in terms of perspective. This makes the stage wider, which is desirable – but too wide, and the identical signal components on both sides, which are responsible for the middle “phantom channel”, cannot properly add up at the listening position and the soundstage gets torn apart in the middle, so to speak. By increasing the listening distance, we reduce the angular deviation and the effective base width becomes smaller without the need to move the speakers.
So let’s put in a piece with a continuous, clearly centered voice – a great example here is “Tom’s Diner” by Suzanne Vega (Retrospective) and actually start with the equilateral triangle. If you are very lucky, the voice will click into place right away and you will have found the listening position already. However, experience shows that more often than not, this will not be the case. Therefore, we now move our listening position back along the center line between the loudspeakers until the voice appears correctly focused. We don’t want to move away any further as from this point on we start to give away stage width without gaining any further benefit …
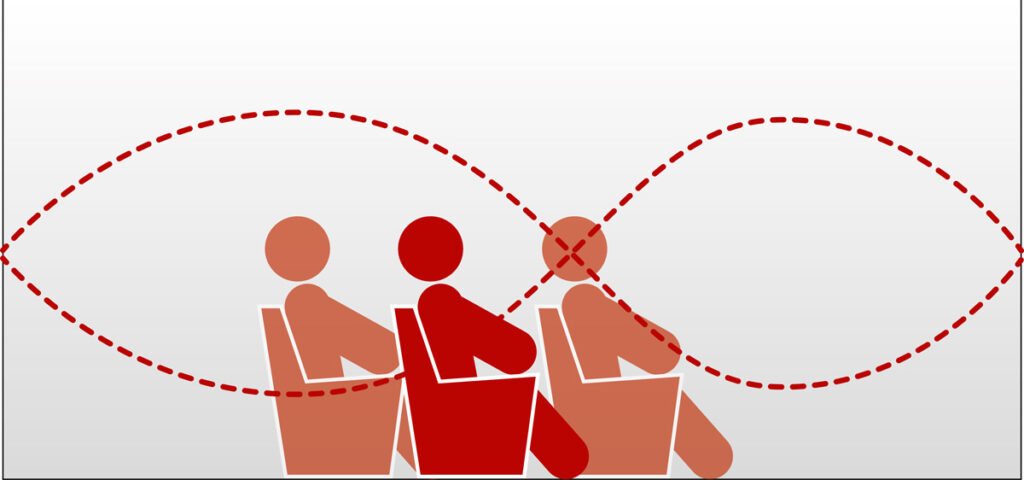
… Unless we run into a bass problem: as you probably know, music reproduction in a room creates standing waves that are in a fixed relationship to the room dimensions. It can happen that the “just right” listening distance happens to fall on a spot where the bass is blown up or canceled out by a room mode. In such a case, it is better to sacrifice a little stage width on the altar of a tonally balanced reproduction – since the wavelengths in the bass are large, but we only have to move away from the “disaster point” by about a quarter of a wave, relatively small adjustments of about half a meter often make a dramatic difference.
Last but not least: toe-in
The last step is to find the right amount of toe-in. There are no really set in stone rules here, because the correct amount can vary greatly from speaker to speaker. As toe-in influences the pinpoint imaging across the entire stereo stage, a piece with a large instrumentation is recommended for this step – classical music, big band, orchestral film music are suitable genres here. The easiest way is to start from a position radiating straight into the room and angle the speakers in bit by bit until all sound events – especially those that are far to the side or above or behind the speaker line – can be clearly located. If at some point you notice that the edges of the stage do not detach properly from the speakers and seem to come directly from them, you have angled them in too much – then simply adjust them back a little until you have found the right balance.
And with that, you’re done – without any trigonometry and just by ear. If you are a perfectionist and want to fine-tune the performance of your system even further from this starting point, then absolutely, go for it – you can almost always get a little bit more out of it with small adjustments. In any case, we hope you’ll enjoy your music.


